Monday, September 29, 2014

Petite Puffs of Ham


PETITE PUFFS OF HAM

Since I’m continuing to force myself to try recipes that are not familiar to me, I ventured into The Ground Meat Cookbook for this dainty meal. As a pre-warning, the original recipe for these “puffs” makes for more of an appetizer or finger-food than it does for an actual meal. But, if dinner is more your style, look to my revisions at the bottom!

Puffs

½ C flour
½ tsp dry mustard
½ C hot water
¼ C butter
¼ tsp salt
2 tbsp grated Parmesan cheese
2 eggs

Sift together flour and mustard and set aside. Boil water, salt, and butter in a saucepan. Add dry ingredients all at once. Beat vigorously with a wooden spoon until mixture leaves sides of pan and forms a smooth ball. Remove from heat and add cheese, stirring until melted. Quickly beat in eggs. Continue beating until smooth and glossy.


Drop by teaspoonfuls onto a greased baking sheet. Bake at 450oF for 10 minutes. Reduce heat to 350oF and bake for 5 minutes longer. Remove to cooling rack and cool completely.


Filling

½ C ground cooked ham
1 tbsp butter
1 tbsp flour
¼ tsp salt
¼ MSG
Pepper to taste
1 C milk
1 tbsp capers
2 tsp minced onion
1 tsp lemon juice

Melt butter over low heat. Blend in flour, salt, MSG, and pepper. Heat until mixture bubbles. Remove from heat. Add milk gradually while stirring constantly. Return to heat and bring to boiling, stirring constantly. Cook 1 to 2 minutes longer. Add remaining ingredients and heat through.


Cut top off of each puff and fill with ham sauce. Replace top.


First, before I get to the revisions, these are very tasty. We enjoyed them as a quick snack before our evening rock climbing.

Revisions

My only revision for the ham sauce would be to add some parsley -- it made the flavor of the sauce a little more fresh and bright.

While the sauce is delicious, the puffs could use some work. If I make this recipe again, I will add more mustard and cheese to the dough recipe. Additionally, the puffs did not rise the way I was expecting. In the future, I would recommend adding 1 tsp or so of baking powder to help the puffs do what their name promises. Dropping the dough by tablespoons, or making a second batch of dough, might help this recipe as well, since I ended up with more ham sauce than puffs.

As a second variation, we decided to use the remainder of our ham sauce with the Golden Gate Snack Bread. Yum!


Have a question or a request? Put it in the comments below and I’ll be sure to respond. Fröhe essen!

Friday, September 26, 2014

Reuben Casserole


REUBEN CASSEROLE

The 18th Annual Bake-Off cookbook brings us a recipe that I was incredibly excited to try. I truly love Reuben sandwiches (and Rachels, by-the-by), so I figured a Reuben casserole would be a delicious dinner as we move into these first cool days of autumn.

Reuben Casserole

11 oz. can sauerkraut, drained
2 medium tomatoes, sliced
2 tbsp Thousand Island dressing
2 tbsp butter
8 oz. shredded corned beef
2 C shredded Swiss cheese
1 canister 6 or 8 biscuits
¼ tsp caraway seed OR fennel seed

Spread sauerkraut in bottom of 12x8 in baking dish. I would definitely recommend strenuously draining the sauerkraut before beginning this recipe. I would also recommend using the 12x8 or even a 13x9 pan, because with a shallower dish the juices will bubble over the sides of the dish up during cooking and you’ll have a stinky burning mess on the bottom of your oven.

Top sauerkraut with tomato slices. Dot with butter and dressing. I cut the butter into slices first, then into little quarter chunks.


Cover with corned beef and sprinkle with cheese. Bake at 450oF for 15 minutes.

Separate biscuits into halves or thirds. Slightly overlap biscuits on top of casserole to cover. Sprinkle with seeds. Bake at 425oF for 15 to 20 minutes until biscuit topping is golden brown.


Wow, this was a surprise winner. I’m not usually a huge fan of casseroles, but this was pretty delicious. All of the ingredients and flavors are true to a good Reuben sandwich (except maybe the biscuits). If I make this again, I will probably add a little more salad dressing. I would also substitute out the pre-made biscuits for some homemade pumpernickel or rye dough dollops. But, all-in-all, a tasty dinner and a good re-warm for lunches in the toaster oven or the microwave.


Have a question or a request? Put it in the comments below and I’ll be sure to respond. Fröhe essen!

Wednesday, September 24, 2014

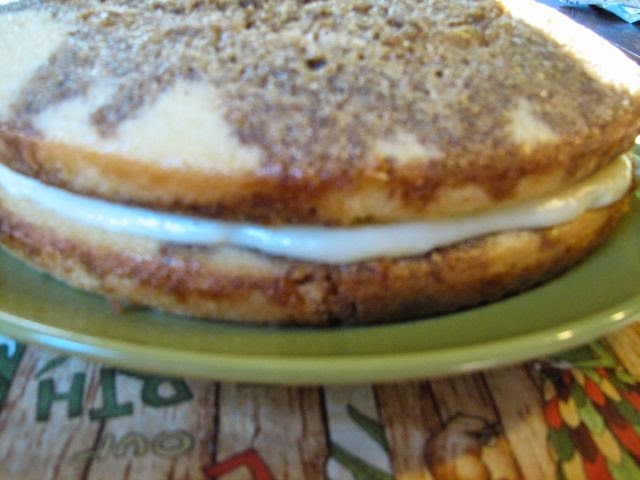
Jamaican Mystery Cake + GIVEAWAY!!!


JAMAICAN MYSTERY CAKE

Dessert time! While I have in my possession a recipe book for 250 Classic Cake Recipes, today I turned to the 15th Annual Bake-Off for a really winning cake recipe.

Cake

2 ¼ C flour
1 1/3 C sugar
3 tsp baking powder
1 tsp salt
1 C milk
½ C shortening
2 eggs
1 ½ tsp vanilla

Sift together dry ingredients. Mix in milk and shortening. Blend 1 ½ minutes with electric mixer. Add eggs and vanilla. Beat another 1 ½ minutes.


Grease and flour two 8-in cake pans. Divide cake batter between two pans. Bake at 350oF for 30 to 35 minutes. Cool completely in pans. While in the pans, prick each cake several times with a fork. I have a special place in my heart for this recipe because it reminds me of a family recipe. As a child, my uncle loved a similar cake that was pricked with a fork and then received a dousing of Jell-o for a sweet rainbow treatment.

Soak

½ C sugar
1 ½ tbsp instant coffee
½ C water

Boil ingredients in a saucepan. Boil for 4 minutes. Spoon soak mixture over both cake layers in the pan. Cool completely. Remove from pans, fill, and frost.


Filling

1/3 C flour
1/3 C sugar
¼ tsp salt
1 ½ C milk
3 egg yolks OR 2 eggs
2 tbsp butter
2 tsp rum flavoring OR 1 tbsp rum

Combine dry ingredients in a saucepan over medium heat. Gradually add milk and eggs. Cook, stirring constantly, until thick. Stir in butter and rum. Cover, chill. Reserve ½ C for frosting. Use the rest of the filling as a layer between the two layers of cake.


Frosting

1 C whipping cream
¼ C confecioner’s sugar

Beat ingredients, including ½ C reserved filling, until thick. Frost cake with whipped cream.


What’s the mystery? I have yet to figure it out, but this cake is AMAZING!


First, we tried it frozen, and the filling and frosting were almost like ice cream. Then, we chilled it in the fridge instead of the freezer, and it was still wonderful. I would make this again in a heartbeat, and I don’t even like the flavor of coffee! The cream and coffee in this reminded us of tiramisu, but the rum gave it a nice kick.


My husband liked this so much he started dreaming up new variations:
Kahlua cream
Hot cocoa/coffee mixture for the cake soak
A combination of mint flavoring and Bailey’s cream
Filled cupcakes

Speaking of which: time for a GIVEAWAY! The next person who starts following this blog AND posts a comment will receive a batch of these Jamaican Mystery filled cupcakes! Send me a message or respond in the comments to claim your prize!

Previous prizewinners include Jamie for sharing my blog and tagging friends, and Tamara for being the first person to comment!

Have a question or a request? Put it in the comments below and I’ll be sure to respond. Fröhe essen!

Monday, September 22, 2014

Sally Lunn


SALLY LUNN

I haven’t made breakfast in a while. So, I cracked open The Creole Cookbook and discovered this recipe. The introduction to Sally Lunn in the original cookbook states that the recipe was made in England in the 1700s by a woman whose name now graces the dish. Apparently it is a favorite breakfast bread down south, though baked as a cake.

Sally Lunn

1 pkg dry yeast

1 C milk

2 tbsp butter

2 tbsp sugar

½ tsp salt

3 ¾ C flour, divided

4 eggs, beaten

I do a lot of baking, so I buy my yeast in jars. If you’re the same way, then the equivalency for us to keep in mind is 2 ¼ tsp = 1 pkg yeast.

Soften yeast in ¼ C warm water and let stand 5 to 10 minutes.

Scald milk. Mix butter, sugar, and salt in a bowl, then pour scalded milk over mixture. Add ½ C flour and beat until smooth. I own a stand mixer, sure – it’s the pride of my kitchen! But, since this is an antique recipe, I decided to do this with a wooden spoon. Now my right arm is super-buff. This batter gets very thick and requires quite a bit of mixing, so if you’re not up to the “wooden spoon challenge,” I definitely recommend using a mixer on low speed.

 
Add in softened yeast and 1 ½ C flour. Beat in eggs. Add final 1 ¾ C flour to create a soft dough. My “soft dough” was more of a batter, but it worked out just fine.


Cover bowl and allow to rise until double, about 1 ½ to 2 hours. Baker beware: this recipe rises like crazy! Make sure that whatever you allow it to rise in, both times, is deep enough that it won’t turn into The Blob and take over your kitchen!

 
Lightly grease 2 cake pans. Beat dough for 5 minutes. Turn into cake pans and allow to rise until doubled, about 1 ½ to 2 hours. Bake at 350oF for 40 to 50 minutes or until Sally Lunns are golden brown.

 
Since these took such a long time to rise, I made them one afternoon and we enjoyed them for breakfast on the following mornings. The bread itself is a little on the dry/bland side, but luckily I have some of my mom’s delicious jam on hand with which to enjoy breakfast bread. I will warn you, though, before you try this recipe: this is a very yeasty bread! We were very surprised at how much of an alcohol taste this had, probably from the intense rising sessions. But, it was a nice breakfast, and I enjoyed toasted slices for lunch at work with some of the leftover Pea Soup.

 
Have a question or a request? Put it in the comments below and I’ll be sure to respond. Fröhe essen!

Friday, September 19, 2014

Mustard Pickles


MUSTARD PICKLES

Continuing the theme of “what do I do with all of these things from my garden?” I embarked upon a quest that I hoped would be delicious by picking this recipe from The New England Cookbook. I love pickles. Like, really love pickles. What can I say? I’m German. My blood is half vinegar!

 
This recipe made ample use of the beautiful cucumbers from my garden, but it also includes some vegetables that make this recipe feel similar to the giardiniera so popular here in Chicago, especially for putting on sausages and hot dogs. The pickles I’m used to are just cucumber slices or spears, but this recipe incorporates cucumbers (from my garden), green tomatoes (also home-grown), green bell peppers, and cauliflower. I recommend, for serving (although I may be getting ahead of myself here), to use the pickle slices as you normally would, and then the rest of the chopped vegetables as a “mustard relish” for hot dogs etc.

Mustard Pickles

1 small head cauliflower
6 C sliced cucumber
3 C sliced green pepper
2 C sliced onion
2 C sliced green tomatoes
¾ C sugar
1/3 C flour
2 ½ tbsp dry mustard
½ tsp tumeric
2 tsp celery seed
4 C white wine vinegar

 
As a note, I diced my green pepper and onion because I’m not a huge fan of large pieces of these vegetables, and also because, as I said above, I assumed that they would serve as a sort of relish upon completion.


After cleaning all vegetables as appropriate, mix together in a large pot. Pour over vegetables a combination of 1 C salt and enough water to completely cover the vegetables. Cover the pot and let sit over night. This is very important! I left my pickles sit for a day and a half because of scheduling issues, and they turned out incredibly salty!

Sterilize jars for canning. The old-fashioned way to do this was with a big pot of boiling water – that’s still how my mom makes her famous jams. However, since the only large pot I own already contained my pickle mixture, I settled for the more modern method of running all my canning supplies through a nice hot session in the dishwasher!

Bring pot with brine and vegetables to boiling. Reduce heat and simmer for 10 minutes. Remove from heat and drain thoroughly. In retrospect, I think rinsing the vegetables a little to remove the excess salt may be a first-rate idea.

Mix dry seasonings together in a pot over medium heat. Slowly add vinegar, stirring constantly. Cook sauce about 10 minutes or until thick. Mix sauce into drained vegetables and simmer 5 minutes.

Ladle hot pickle mixture into jars. Clean jar rims and seal. If your mixture is hot enough, like mine was (luckily), the jars may seal themselves! If not, you’ll have to force them to seal, often in a hot water bath.

  
This recipe made approximately 7 pints of pickles. While they are tasty, they are very salty because I let them sit too long! I would recommend only letting them sit one night in the brine before finishing the pickling. Additionally, while the mustard flavor is there, you could definitely add another tablespoon of mustard, or even some garlic powder or paprika, without making the flavor overwhelming. I plan to enjoy these pickles on burgers, and the relish on hot dogs.

Have a question or a request? Put it in the comments below and I’ll be sure to respond. Fröhe essen!

Wednesday, September 17, 2014

Pomodori Imbottiti


POMODORI IMBOTTITI
Stuffed Tomatoes

To pair with my Neapolitan Pork Chops, I chose this recipe from The Italian Cookbook. Again, this choice may have been made out of a desperation to use the prolific amount of produce my backyard gardening is, well, producing!


Normally this recipe would call for 6 large tomatoes (like beefsteaks or some other big, spherical tomato), but since romas are what seem to be exploding out of my garden, romas are what I used.

Pomodori Imbottiti/Stuffed Tomatoes

1 C precooked rice
4 oz process cheese food (see below)
1 chopped clove garlic
6 large, firm tomatoes (or several of whatever kind of tomato you have on hand)

Before I begin the recipe, I need to say a few words about this “process cheese food.” When I showed this recipe to my husband, we agreed that what we think the authors were calling for was either something akin to that canned aerated cheese, or something like the little plastic-wrapped “singles.” I don’t plan on ever buying either of those products, except maybe for a party gimmick recipe. Instead, I substituted 1 C of grated Fontina, a nice melty Italian cheese. You can use any cheese you like in this recipe, but I would recommend actual cheese instead of “process cheese food.”

Heat olive oil in skillet and lightly brown garlic. Mix garlic, oil, cheese, and rice together and set aside. I also added some basil and oregano to my mixture to make it feel a little more Italian and add the extra oomph of flavor that so many of these recipes are missing.

Rinse and remove stems from tomatoes. Remove tops of tomatoes and set aside. I didn’t do the part where the recipe says to replace the tomato caps because the romas were so small. Remove the “guts” from the tomatoes, being careful not to cut through the bottom. Strain the pulp and set aside the liquid.


Fill tomatoes with rice mixture. The mixture in the recipe did not make enough to fill all of my tomatoes, so I used some of the leftover meat mixture from the cabbage rolls. Sprinkle remaining tomato liquid over the tomatoes and replace tops. Place tomatoes in baking dish and sprinkle with olive oil. Bake at 375oF for 20 to 25 minutes.


These were a really big hit with everyone who tried them (thank you again to my friends and coworkers for helping us eat the leftovers!), although they were missing a certain amount of salt. I think from now on I will just add a little more salt and pepper than the recipes call for to balance out the flavors.

Have a question or a request? Put it in the comments below and I’ll be sure to respond. Fröhe essen!

Monday, September 15, 2014

Costatelle di Maiale alla Napoletana


COSTATELLE DI MAIALE ALLA NAPOLETANA
Neapolitan Pork Chops

First, a very happy 2nd Anniversary to my hubby! Yesterday we spent a lovely day at my place of employment (because I work weekends), and once I got off my shift we had lunch, watched an aquatic show, and spent 20 minutes in an encounter with a beluga whale!!! <3

Another excursion into The Italian Cookbook brings us pork chops.

Costatelle di Maiale alla Napoletana/Neapolitan Pork Chops

1 minced clove garlic
6 pork chops
1 tsp salt
½ tsp MSG
¼ tsp pepper
1 lb mushrooms
2 green peppers
½ C canned tomatoes
3 tbsp white wine


Heat olive oil in a skillet and brown garlic. Season pork chops with a mixture of salt, pepper, and MSG. Brown pork chops in the pan with the garlic.

 
Add the mushrooms, peppers, tomatoes, and wine to the pan. Cover and cook over low heat 1 to 1 ½ hrs.

 
This recipe was easy, and very tasty. I served it with the Stuffed Tomatoes for another yummy Italian dinner.

The only thing I would change about the pork chop recipe is the cooking time – there’s no need to cook the chops for an hour! By the time I took them out of the pan, they were very dark on one side and rather dry. 20 minutes should be good, and you can always test for doneness and cook a little longer.

Have a question or a request? Put it in the comments below and I’ll be sure to respond. Fröhe essen!

Friday, September 12, 2014

Kaldolmar


KALDOLMAR
Stuffed Cabbage Rolls

My husband observed the other day that I have been sticking to mostly “safe” recipes from the antique cookbooks. Fair enough, I definitely did start out by picking recipes with which I am at least a little familiar.

So, I ventured into The Scandinavian Cookbook. I cannot lie: I feel a little fear when I page through this book, resplendent with recipes for aspic and fish pudding…

However, here is a recipe out of my normal sphere of reference, but still appetizing:

Kaldolmar/Stuffed Cabbage Rolls

1 head cabbage
1 lb ground veal (I used ground pork because the grocery store didn’t have veal)
1 lb ground beef
1 ¼ C milk
2/3 C dry bread crumbs
4 tsp grated onion
2 ½ tsp salt
1 tsp nutmeg

Discard wilted outer cabbage leaves. Halve cabbage head and remove core. Put cabbage in sauce pot and cover with salted water. Cover and simmer about 5 minutes or until leaves are softened. Drain cabbage and carefully separate leaves. Definitely be careful with this one! The cabbage leaves were very hot, and the outer thin ones were softened that they were easy to rip. I would recommend boiling the cabbage for a few minutes, draining and removing the outer leaves, then re-boiling the cabbage to continue to soften the thicker inner leaves.


Mix the remaining ingredients in a bowl. Drop a small amount (no more than ¼ C) of the meat mixture onto a leaf. Roll each leaf, tucking the ends in toward the center. Fasten securely with toothpicks or string. Rolling these was a lot more difficult than I expected, and it definitely took a little practice. This is the point at which I realized that 1 head of cabbage is not enough leaves for the meat mixture suggested in the original recipe, and also that the inner leaves needed to be boiled longer before they would fold easily.

 
Fill the sauce pot with salted water and bring to a boil. Add the cabbage rolls carefully. Once all the rolls are in the pot, reduce heat, cover, and simmer for about 20 minutes. Remove toothpicks or string.

Gravy

3 tbsp butter
3 tbsp flour
¾ tsp salt
½ tsp cardamom
2 C milk

Melt butter in pan. Stir in flour, salt, and cardamom. Heat until mixture bubbles. Gradually add milk while stirring. Return to boiling until mixture thickens.

 
So, I might have been a little nervous, but this recipe turned out okay. My cabbage rolls didn’t explode like I was worried they might. These were warm and filling, satisfying the way a Nordic dinner should be. Unfortunately, like I have noticed with a lot of these antique recipes, this recipe is missing seasoning. Both the meat mixture and the gravy taste very bland. I would recommend upping the salt content a little. But, if you’re adverse to adding salt, try upping the cardamom and nutmeg – maybe even add some allspice?

Like I said, the meat mixture in this recipe makes too much for one head of cabbage. I used up my extra meat mixture by putting it in my Stuffed Tomatoes. But, you could also mend this situation by using a second head of cabbage.

Have a question or a request? Put it in the comments below and I’ll be sure to respond. Fröhe essen!

Wednesday, September 10, 2014

Zucchini alla Parmigiana

Zucchini alla Parmigiana
Zucchini Parmesan

Well, summer is winding down and I'm harvesting the last bits of produce from my garden. What to do with my beautiful zucchinis and tomatoes? To The Italian Cookbook!


Combined with a free summer squash from the gardens at my place of employment, I decided to transform my humble home-garden zucchini into Zucchini Parmesan.

Zucchini alla Parmigiana/Zucchini Parmesan

2 1/2 lbs sliced zucchini
2/3 C chopped onions
1/4 lb sliced mushrooms
2/3 C grated Parmesan
1 1/2 C tomato paste
1 tsp salt
1/2 tsp MSG
1 minced clove garlic
1/8 tsp pepper


Heat olive oil in a pot. Add zucchini and mushrooms. Cover pot and cook mixture over low heat 10 to 15 minutes or until tender, occasionally moving and turning with a spoon. The squash I used had such mature seeds inside them that I poked out all the seeds first so they wouldn't be too crunchy in the finished product. I salted the seeds and put them in the oven, just like we do with the seeds from pumpkins in the fall. Delicious!


Remove zucchini mixture from heat. Stir in half of the grated cheese. Pour in remaining ingredients. Blend lightly and thoroughly.

 
Turn mixture into casserole dish. Sprinkle with remaining cheese. Bake at 350F for 20 to 30 minutes.


I paired this delightful Parmesan with a simple pan-browned chicken breast. A little white wine and, PRESTO, a warm and comforting end-of-summer Italian dinner.

Have a question or a request? Put it in the comments below and I’ll be sure to respond. Fröhe essen!  

Monday, September 8, 2014

Hexenschnee

HEXENSCHNEE
Witches' Snow


While paging through The German & Viennese Cookbook, my husband expressed interest in this recipe, if only for the name of the dish.

It seems like an incredibly simple dish, so we decided to have it for “Nachtisch.” (As a point of hilarity, “nach” means “after” and “Tisch” is a table, so “Nachtisch” is the German word for dessert. However, be careful not to confuse it with a “Nachttisch,” a combination of the words “Nacht” and “Tisch,” meaning bedside table!)

Hexenschnee/Witches’ Snow

¼ C cold water
1 tbsp/1 pkt unflavored gelatin
2 C thick sweetened applesauce
¾ C sugar (I used brown sugar)
½ C apricot preserves
2 tbsp rum (I used white rum)
1 tsp lemon juice
2 egg whites

Sprinkle gelatin over water and allow to soften. Mix the remaining ingredients (except for egg whites) in a large bowl.


Dissolve gelatin completely by placing over very hot water. Stir gelatin into mixture until sugar is completely dissolved. Chill in refrigerator until mixture begins to gel, stirring occasionally. I left mine in the fridge for over an hour without any noticeable gelling, at which point I decided to continue the steps for the sake of time.

Lightly oil mold with cooking oil. Set aside to drain. I used seven small ramekins I happen to have, and I set them upside-down on a paper towel after oiling them.


Add egg whites to refrigerated mixture. Beat with electric mixer until mixture is very thick and piles softly (about 14 minutes). After 14 minutes of electric mixing, my Hexenschnee looked fairly frothy, although I wouldn’t say it was piling on its own much. Fill the mold. Chill in refrigerator until firm (about 4 ½ hours).


When ready to serve, unmold onto chilled serving plate. Garnish with fresh fruit if desired.


The resulting pretty little custard-like dessert was INCREDIBLY sweet, and of a slightly strange texture. The darker coloration on the top seemed to be some of the preserves or something that settled out to the bottom of the mold during chilling. The applesauce gave this a weirdly grainy texture, and it was sorely missing any sort of spicing like cinnamon or nutmeg or allspice.

I have some ideas about what I can do to improve this recipe in the future, but the original recipe result is by no means a disaster.

Have a question or a request? Put it in the comments below and I’ll be sure to respond. Fröhe essen! 

Friday, September 5, 2014

Rotkohl

WARNING: REHAB PATIENT

ROTKOHL
Sweet-Sour Red Cabbage

I'm going to warn everyone up front: this was a TERRIBLE FAILURE. I'm not sure why, except perhaps that the cabbage didn't cook long enough or there wasn't enough sugar or water. In any case, I plan to rehabilitate this recipe with my own augmentations at some point in the future.

However, for right now, here is the original recipe from The German & Viennese Cookbook:

Rotkohl/Sweet-Sour Red Cabbage

2 lbs red cabbage
1/3 - 1/2 C brown sugar
3/4 tsp allspice
4 whole cloves
1/2 C vinegar
1/4 C butter


Rinse,  core, quarter, and shred the cabbage. Put the cabbage in a saucepan with enough salted water to cover it, along with the sugar and spices. Cover loosely and boil 8-12 min or until cabbage is just tender.


Remove from heat and drain. Add vinegar and butter to cabbage, toss to coat and serve.

Well, I served this with the Sauerbraten and Potato Salad, but this was the odd-one out in an otherwise wildly successful meal. The cabbage was tender, sure, but it tasted so unbearably like sulfur that we just couldn't eat it.

                                          Instead, we gave it to the "garbage disposal."

Like I said, I think the trouble with our cabbage may have been the water. Since my other two pots were engaged with the Sauerbraten and Potato Salad, I had to use my smallest saucepan for the cabbage and couldn't cover it with the salted water. I would definitely recommend covering the cabbage completely in the salted water for cooking, and maybe add a bit more sugar? Good luck!

Have a question or a request? Put it in the comments below and I’ll be sure to respond. Fröhe essen!

Wednesday, September 3, 2014

Warmer Kartoffelsalat

WARMER KARTOFFELSALAT
Hot Potato Salad

While my German-heritage family has made potato salad for years, the first time I ever enjoyed hot potato salad was at a local Christkindelmarkt while I was in college. When I chose Sauerbraten for our evening meal, I decided to pair it with the hot potato salad from The German & Viennese Cookbook.

Warmer Kartoffelsalat/Hot Potato Salad

2 lb potatoes
12 slices bacon
1 1/2 C chopped onions
1 C plus 2 tbsp vinegar (I used white wine vinegar) 
1 1/2 tbsp sugar (I used brown sugar) 
1 1/2 tsp salt
3/4 MSG 
1/4 tsp pepper

Wash the potatoes and cut into halves. Boil potatoes for about 20 min or until potatoes are tender when pierced with a fork. Dry and cut into quarters.


Dice and fry the bacon. Reserve the drippings. Use about 6 tbsp of the bacon fat to cook the onion until transparent. Add the rest of the ingredients to the onions and heat to boiling. Add in the diced bacon. Pour entire heated mixture over the potatoes and toss lightly to coat evenly.


This is a delightfully simple recipe, and it was sooo delicious! By itself or coated in some of the Sauerbraten gravy, this is absolutely a hit!

Once again, thank you to my friends and coworkers for tasting this recipe!

Have a question or a request? Put it in the comments below and I’ll be sure to respond. Fröhe essen!

Monday, September 1, 2014

On MSG

First of all, Happy Labor Day weekend! I hope that you all are having a relaxing weekend. I, unfortunately, am spending this weekend at work, not at home cooking, but never fear -- the regular recipe posts will resume on Wednesday!

MSG or Monosodium Glutamate is basically a salty protein. It can be derived from seaweed, wheat, corn, and other vegetables -- it is a naturally found amino acid. MSG has a flavor that has been recognized as a fifth distinct flavor from sweet, salty, sour and bitter: "umami." "Umami" basically means "savory."

Many scientific studies have been done on MSG because it is classified in some countries as a regulated food additive. However, none of these studies have shown that MSG is bad for you. Some people claim to have a sensitivity to MSG, but in small amounts it seems to do you no harm.


So, I broke down and bought some. So many of these old recipes in the antique cookbooks call for MSG that I figured I should try it out. MSG was first isolated in Tokyo in 1908, so in the 50s it was very trendy for adding a savory undertone to foods. Nowadays, most people are familiar with MSG as an additive in Asian take-out food. And that's exactly where I was able to find MSG. There's such a stigma against this salty protein in the USA that the only place I could find it for sale was in the Asian foodmart down the street from where I live.

I tried a tiny bit solo, just as an experiment, and sure enough, I can identify the flavor as a background note in a lot of my favorite Asian foods. Most of the recipes I've seen that call for MSG in my antique cookbooks only ask for a little bit (less than a teaspoon), so I think I'll be fine. However, if you're still unsure about MSG, you will probably be safe leaving it out of any of the recipes you choose to try.

Have a question or a request? Put it in the comments below and I’ll be sure to respond. Fröhe essen!